
Make a Simple Fantasy Map
Think you’re lacking the skills to make a proper fantasy map for your latest campaign? Well, so am I! Or at least that’s what I thought. I figured out how to make a passable campaign overworld map in about an hour or so (after some practice). Follow along, and you’ll have your very own hex crawl map table ready in no time!
Get the Tools
First, I’ll be using the free image editing software called Gimp. You can download the latest version here: https://www.gimp.org/
I’ll also be using a free script for Gimp to make a hex grid overlay which can be found here: http://registry.gimp.org/node/15852 To install a script (which ends in .scm), you just drop it in the Scripts folder which on my computer is at Program Files -> GIMP 2 -> share -> gimp -> 2.0 -> scripts. Once you load up Gimp again, the script will be ready to use.
Finally, I have found it useful to have some cartography brushes to get the mountains, hills, trees, towns, etc. There are tons of them for free on DeviantArt (just make sure to check the permissions for whether you can use it or not), but these will get you started: https://calthyechild.deviantart.com/art/Tolkien-style-Map-Brushes-138796530 To install brushes, you can drop a whole folder of brushes in the brush folder which on my computer is at Program Files -> GIMP 2 -> share -> gimp -> 2.0 -> brushes. Once you load up Gimp again, the brushes will be available for use.
Prep the Background
Let’s start by creating a new picture. I chose a 10 inch width by 7.5 inch height so it would fit on a single page landscape orientation. I also left it at 72 ppi (pixels per inch) since I’m not planning on printing this out professionally, but if you’d like higher detail you can use 300 ppi.
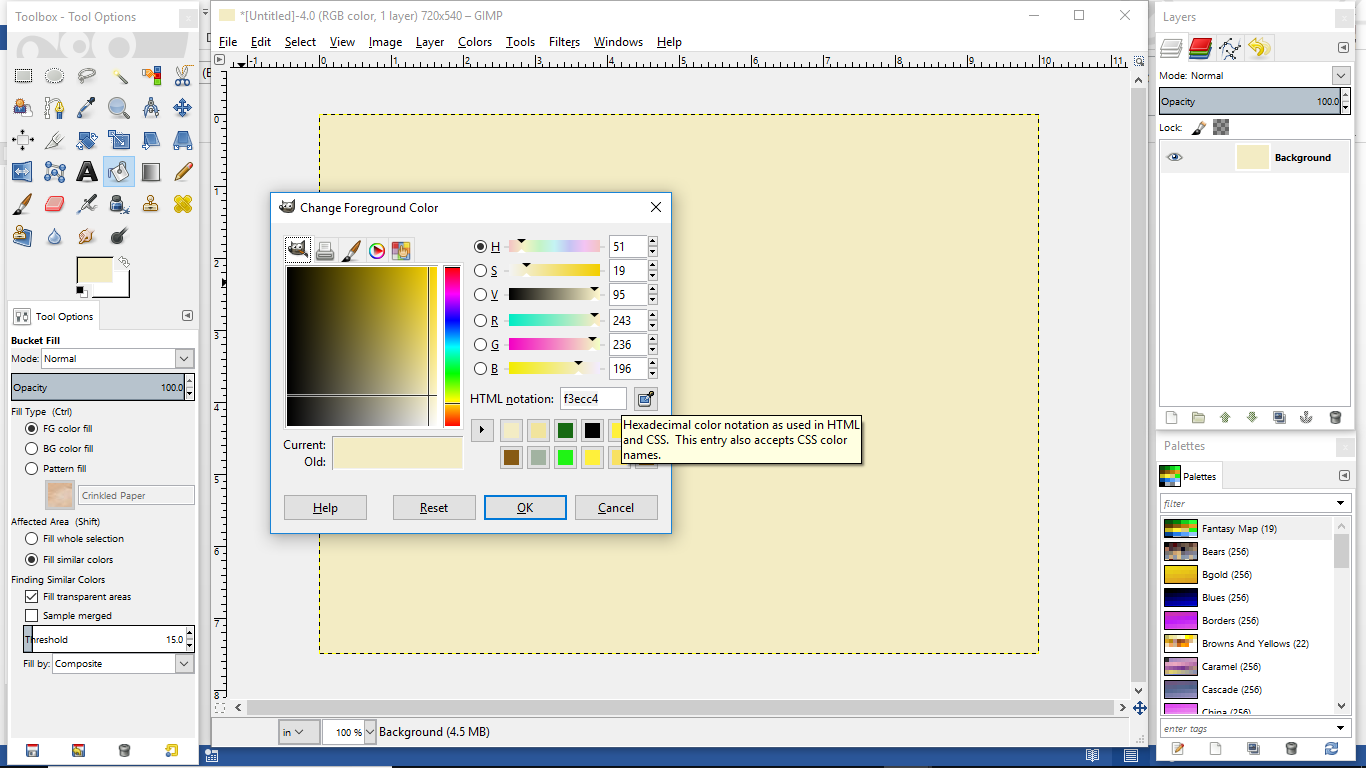
The first thing I’m going to do is paint the background a light tan which I’ll then “age” to make it look like old paper. I picked the color f3ecc4 and filled the background with the paint bucket tool.
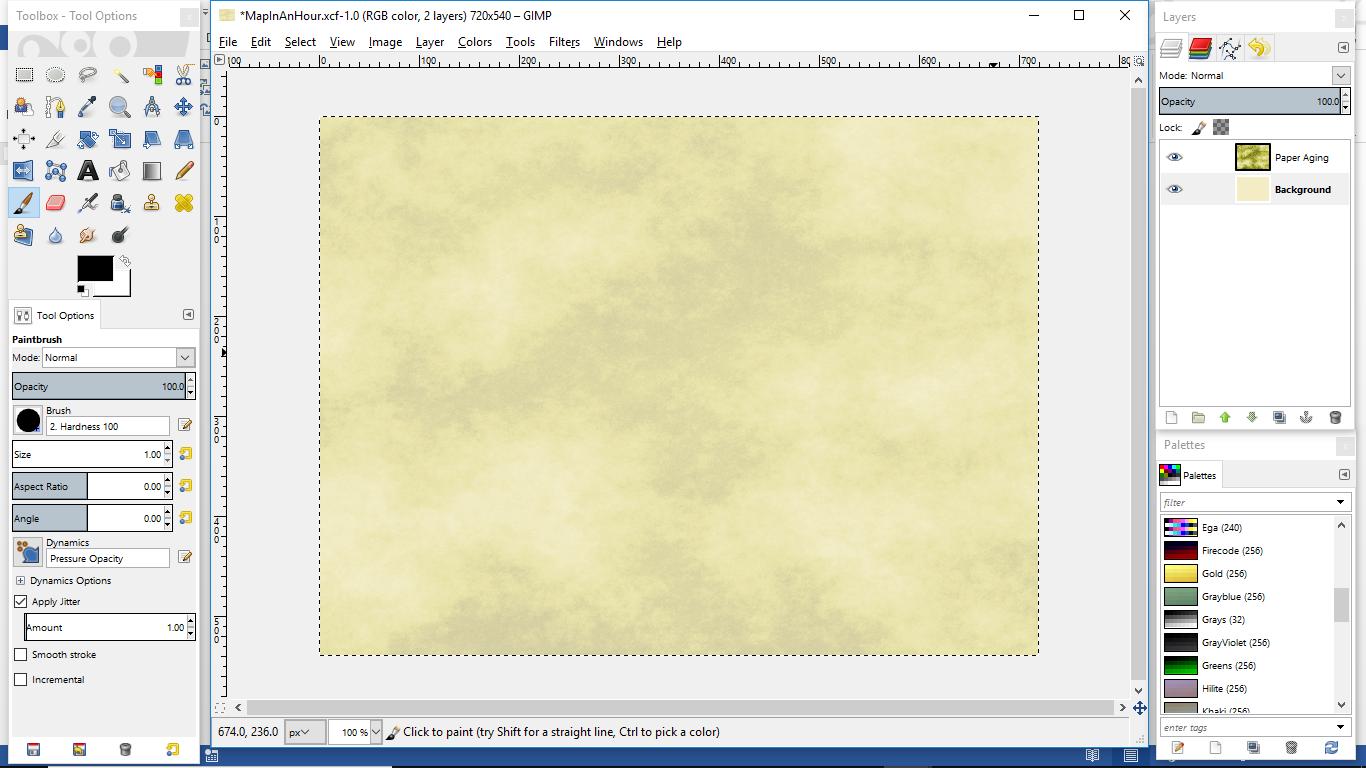
Next, I need to get that aged look. So I’ll create a new transparent layer which I’ll name “Paper Aging”. With that layer selected, I’ll go up to Filer -> Render -> Clouds -> Plasma. I set the Turbulence at 3.0 and picked a new seed. This will produce a rainbow looking field of scattered dots which we will then tame down to normal colors. Now go up to Colors -> Colorize and set the Hue to around 60, Saturation to about 50, and Lightness to about 20. Now it’s more of a random scattering of different colored brown points. Go back up to the upper right of the layers and set this layer’s opacity to about 20. Boom! Old paper!
Rough Sketch
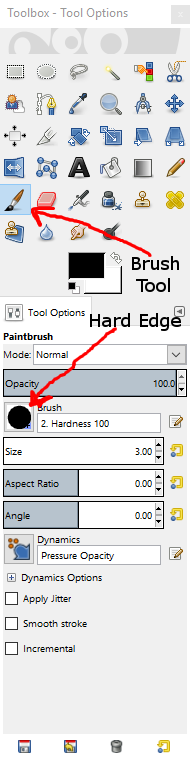 To start this map off right, we need to do a little planning. Let’s begin by making a new transparent layer called Rough Sketch. On this layer, I’ll choose the Brush Tool and make sure I have the hard edge circle selected. I think the fuzzy edge is the default, and hard edge works better in my opinion.
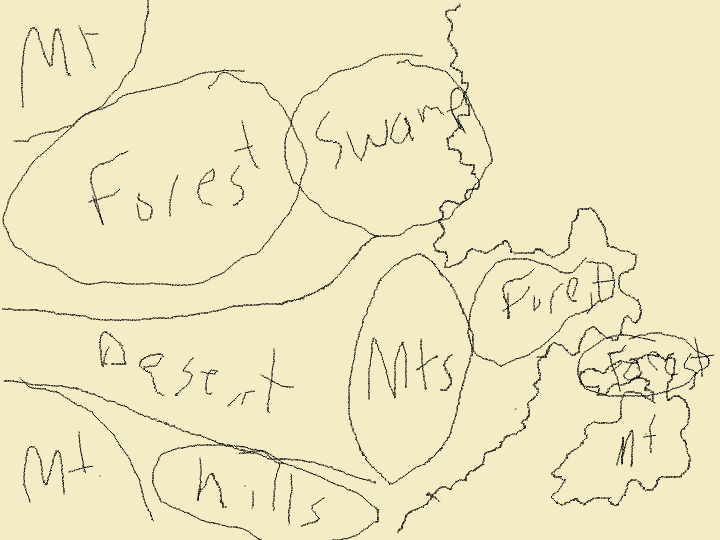
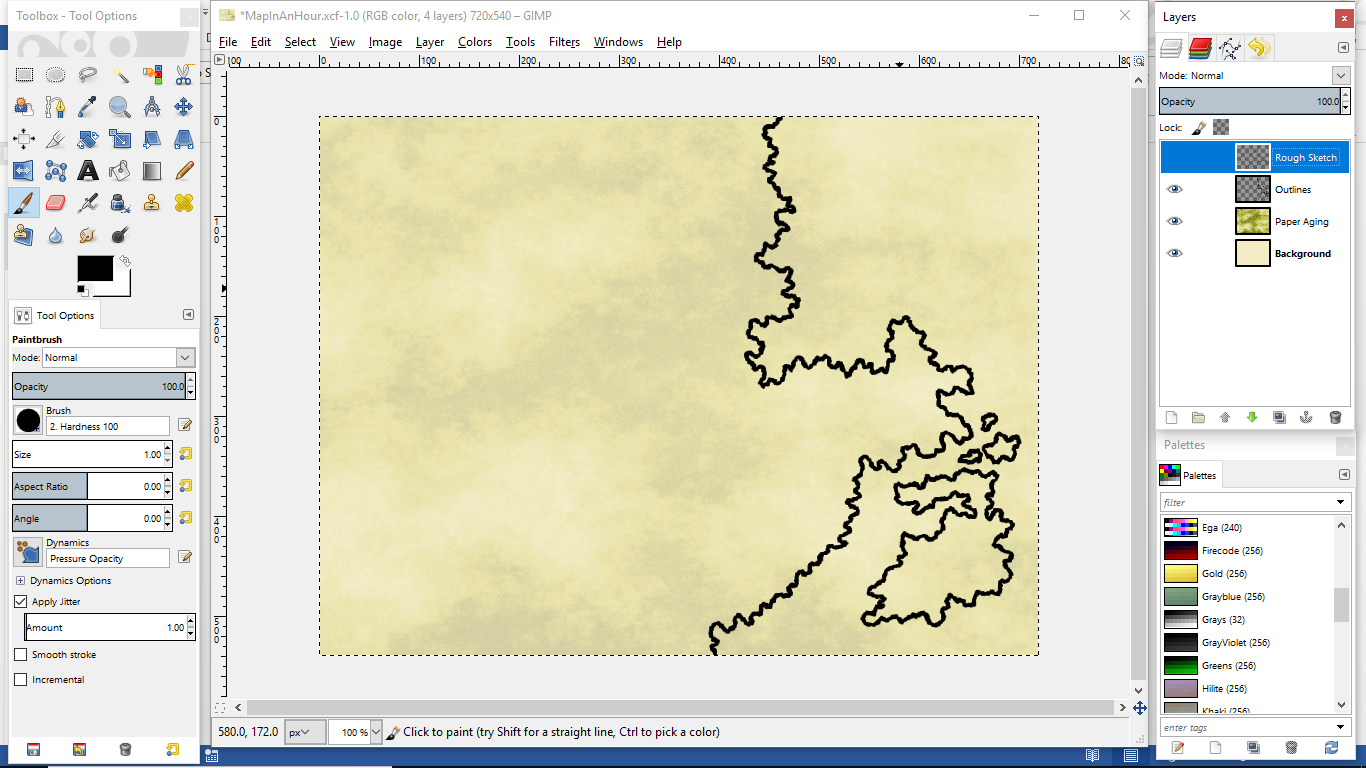
On this layer I’ll make a quick sketch of the terrain I would like on my map. For this tutorial, I’m going to make my coastline only be on the east side, and I want to include most types of terrain so we can show how to color each one.
You can see my rough sketch in the picture.
The Major Outline
Now make a new transparent layer which I’ll title Outlines. Pick the brush tool and make sure the hard edge circle is selected as the actual brush. I would use the color black with a brush size of 3 px. (If you want a sketchier type look, you can set the Apply Jitter anywhere between 0.5 and 1.)
I would start by getting the major land masses identified in your Rough Sketch. We won’t fill in the forest outlines until we get the mountains set.
To get your coastlines, don’t use too many straight lines or smooth curves. Coasts are jagged and nearly fractal in nature, so feel free to get bumpy with them. In fact, I usually zoom in a little bit so I can get even bumpier. Mine may be a little bumpier than normal, but I’m happy with it.
Mountains
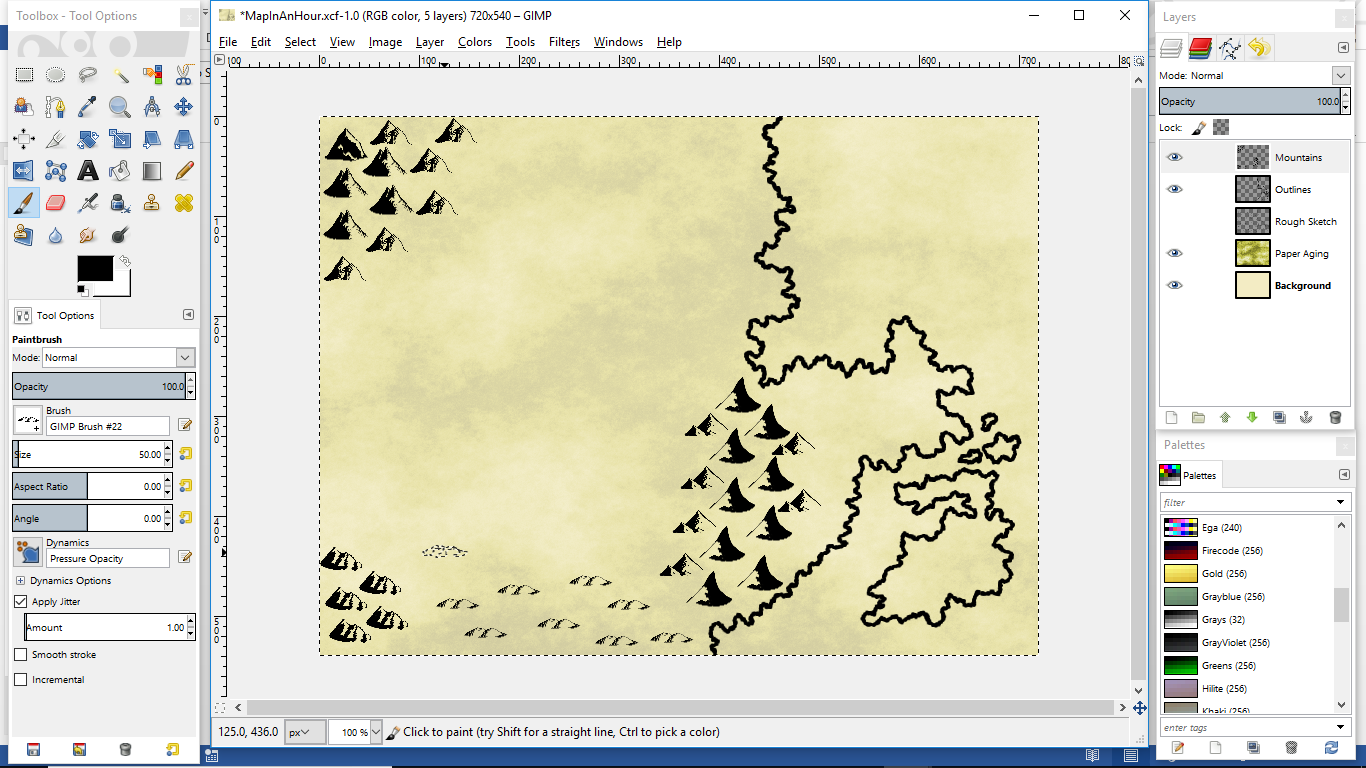
Since mountains usually act like natural boundaries, let’s put those in next. To do this, first create a new transparent layer which we can call Mountains. I’ll then select one of the mountain shaped brushes and vary the size of the brush to get different sized mountains. In my map, I picked the size 50 px for my brush and just switched brushes to different types of mountains. I also put my hills in this layer since they are coming off the mountains.
Forests
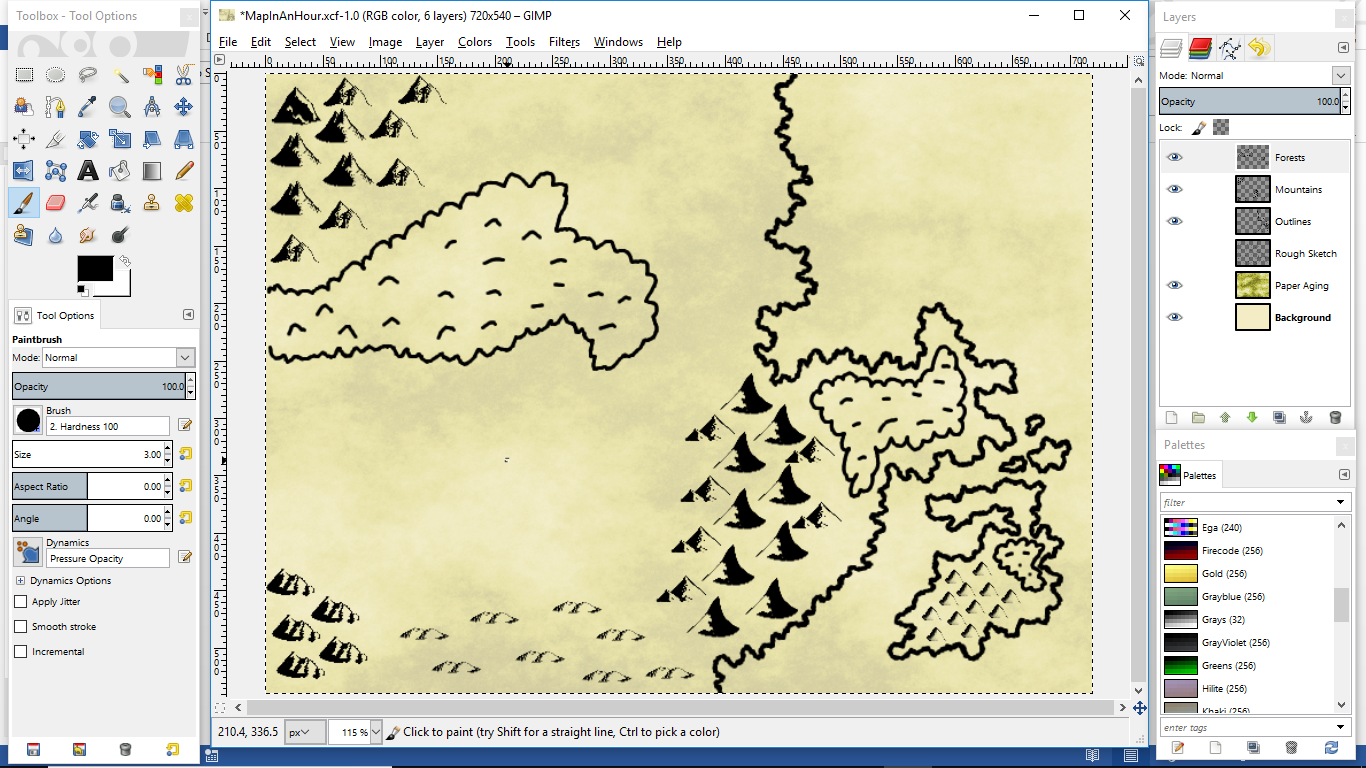
The forests are our next border defining feature, and I define the outline of each forest using much the same method as I did for the continent outlines. Along with the bumpy outline that I draw in with the paintbrush tool set to black and 2 or 3 px thickness, you might also put a few bumps in the middle of the forest blog to give it some texture, but that is optional. All of this I have put on a new transparent layer that I called Forests.
As an alternate to the outline version, you might also use the tree icons as a brush if you like that better. I find that I prefer not to use icons for forests so that it’s easier to put names on the top or drop in a city with less hassle.
Base Terrain Colors
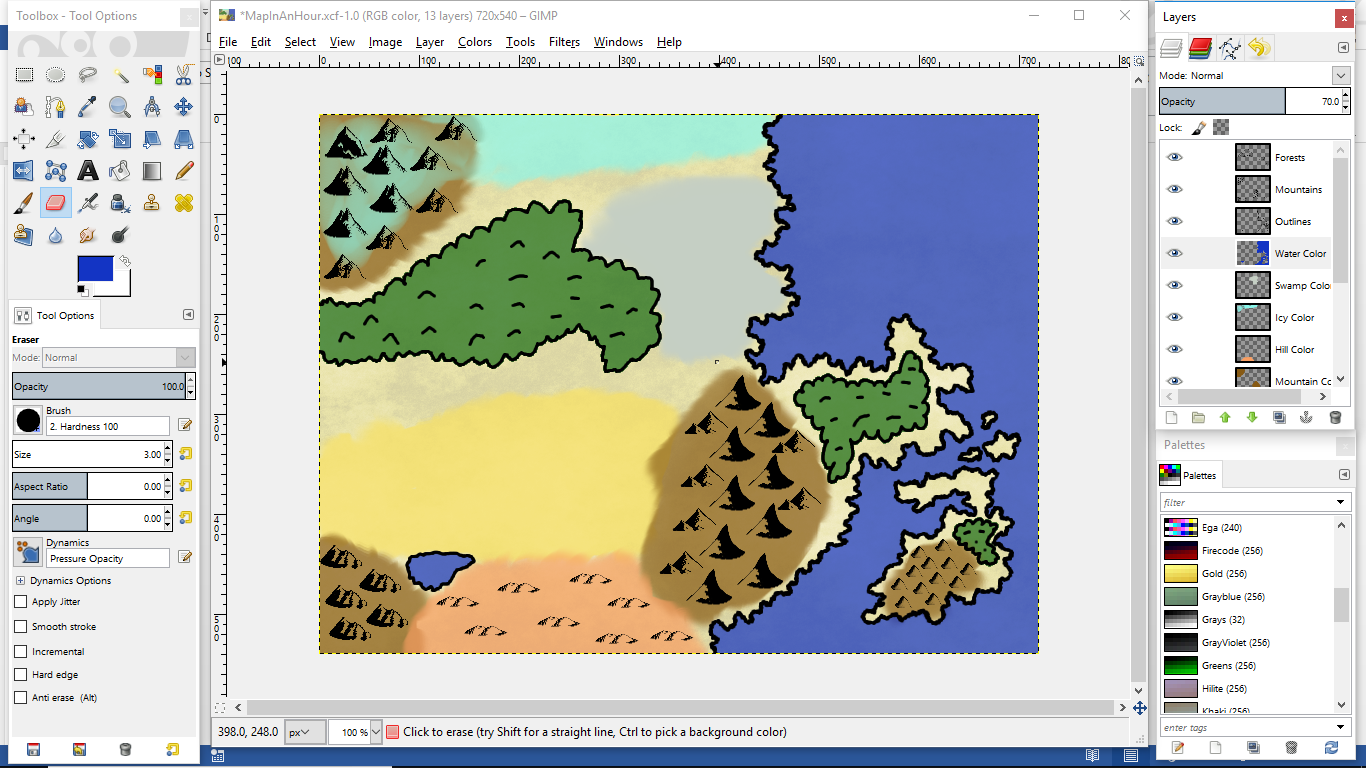
Next, I’ll lay down some colors for the basic terrain of each area. I’ll make a layer for each color so that I can easily modify one without messing up the other which means I’ll have layers named Mountain Color, Hill Color, Forest Color, Desert Color, Swamp Color, and Icy Color.
For each of the terrains, I just pick a nice background color that I’ll fade a little bit using the transparency of the layer so it’s not overwhelming by setting it to 70% transparent. Also, on each layer, I didn’t want a hard or definite edge, so I used the smudge tool to run along the edges forcing the color to bleed out a little bit. By doing the smudge, I noticed there was a nice place to drop a lake between the mountains, hills, and desert, so I drew the outline of a lake back in the Outline layer.
The Forest Color layer is a little different. To make sure I filled up the whole forest without having to go into every nook and cranny, I first went to the Forest layer (the outline). Then I used the magic wand tool to select anywhere outside the forests. This grabs all non-forested area on the map. To get inside all the forests at the same time, I went to Select -> Invert. Now I switched back to the Forest Color layer with the selections still active and used the paint bucket tool (rather than a brush) to fill all the forests at once with a dark green.
The Water Color layer is done in a similar way as the Forest Color. Go to the Outline layer, select the ocean, and then change to the Water Color layer to paint the water a deep blue using the paint bucket tool. I didn’t select non-ocean and then invert because there is only one ocean on my map. I then did the same thing for the newly drawn lake.
A Note about Layers
You may be wondering why I’m putting each new thing on new layers. The answer is that it gives me more flexibility to change things later on. I can also change the order that they are in to make sure my outlines cover up any color underneath which lets my borders really pop.
To make sure the colors don’t cover up your outlines, you need to make sure the color layers are below the outline layers. You can just click, grab, and drag the layers up or down as needed. The nice thing about the outlines being on top means you don’t have to have the colors perfect because the outlines will cover the edge of the color.
Rivers
When you decide where the rivers go, keep a couple of things in mind. Usually rivers flow from high spots to low spots (unless magic dictates otherwise in your world). Also, rivers tend to join together rather than split apart because the water is always flowing downhill, so all the water congregates towards the same places.
I’ll add in a couple of rivers just using a blue paint brush tool, but I’ll put them on their own layer. After drawing the rivers with a 3px brush, I went back with the eraser tool and erased just a little bit at the start of each river so it looks like the river gets bigger as it goes along.

Optional Textures
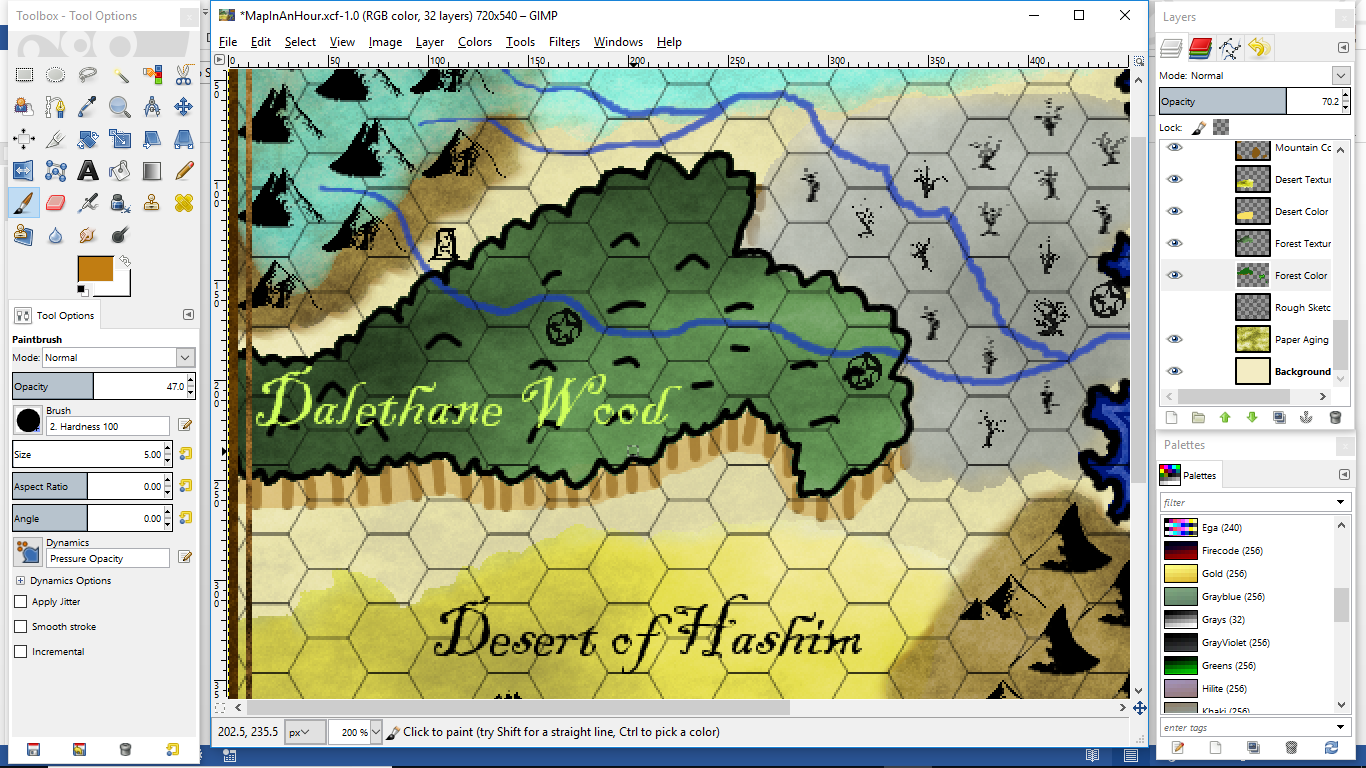
To add some texture to each colored layer (so it doesn’t look static and plain), you have two options. The first is to go back to each color and add a second color with the airbrush tool and then smudge it all around to some mixed colors. I’ll do that in the peninsula forest with a lighter color greenish yellow.

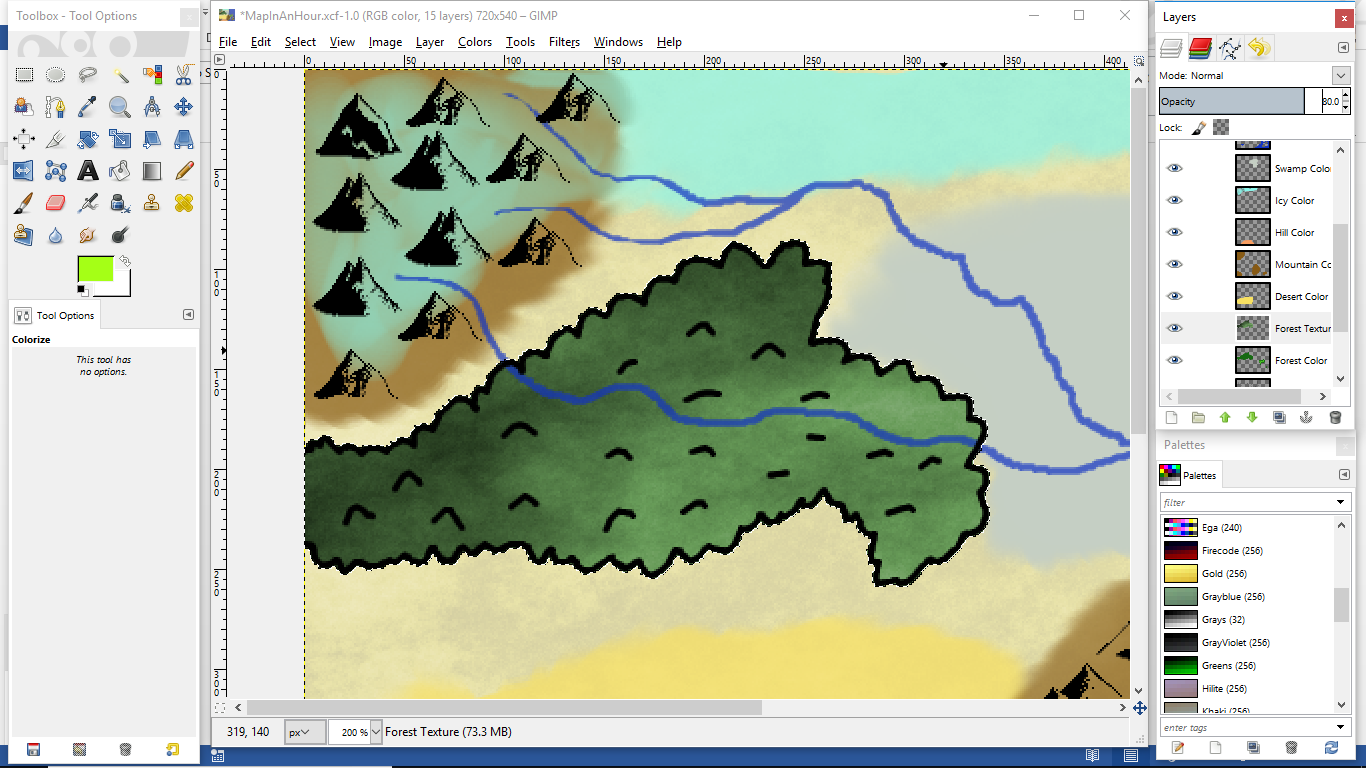
The second option is to select just the color itself using the magic wand and put a texture on top with a new layer. I’ll show you that with the big forest on the left side of the map. What I did was select the green section on the Forest Color layer, make a new layer called Forest Texture, and then do Filters -> Render -> Clouds -> Plasma which will now show up only in the selected forest area instead of the whole map. You can play around with more turbulence (to get more variation) and change the Seed (which starts the randomization process) to get different looks.
At first, you’ll be confused because it will look like a rainbow of color. But remember that we’ll fix it by re-coloring the mess into a single color palette to make it work just like we did to make the Old Paper look at the beginning. So, once you get your crazy rainbow forest on the Forest Texture layer, choose Colors -> Colorize and change the hue to a more green setting like a hue of about 130. You’ll want to set the saturation high enough that it doesn’t completely gray out and lightness the same, but it’s really up to your tastes for those two settings. Finally, I dropped the transparency of the Forest Texture layer to about 70%. That gave me the following results.
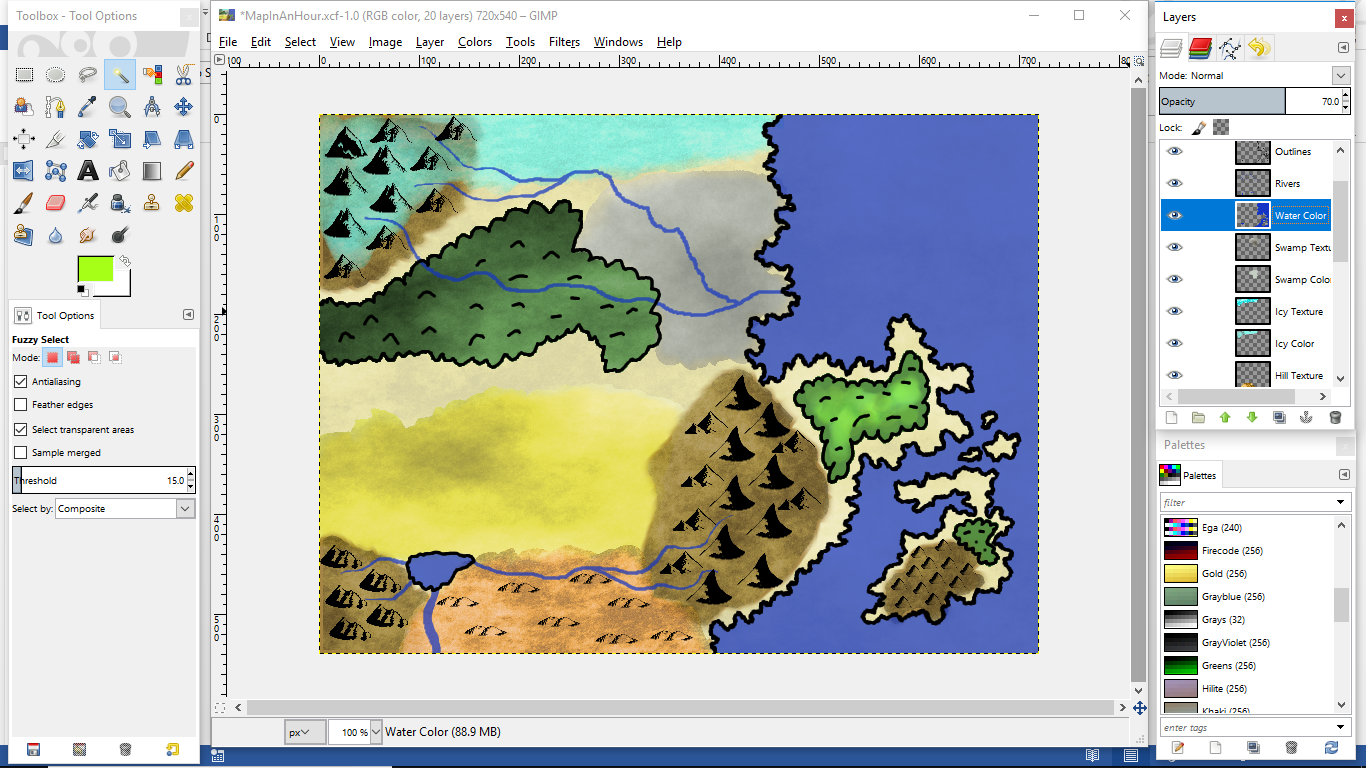
You can do the same things with all the different terrain color layers to your liking (or use the smudging different colors together like I did at first if you want to be faster). Here are my results for the whole map except for the water which I’ll talk about that separately. I used a really high turbulence on the hill section, and I probably should have kept that one smoother while the desert should have higher turbulence. Live and learn!
Water, Water Everywhere
To get the water to look choppy, I’ll use the same trick of selecting the water with the magic wand, making a new layer, and then Filters -> Render -> Clouds -> Fog with a really high turbulence. (I often can’t tell the difference between Fog or Plasma as a setting, but I think the Fog turned out better than Plasma this time around.) The Fog tool lets you choose a color to mess around with instead of having to colorize the rainbow like we did with the Plasma tool.
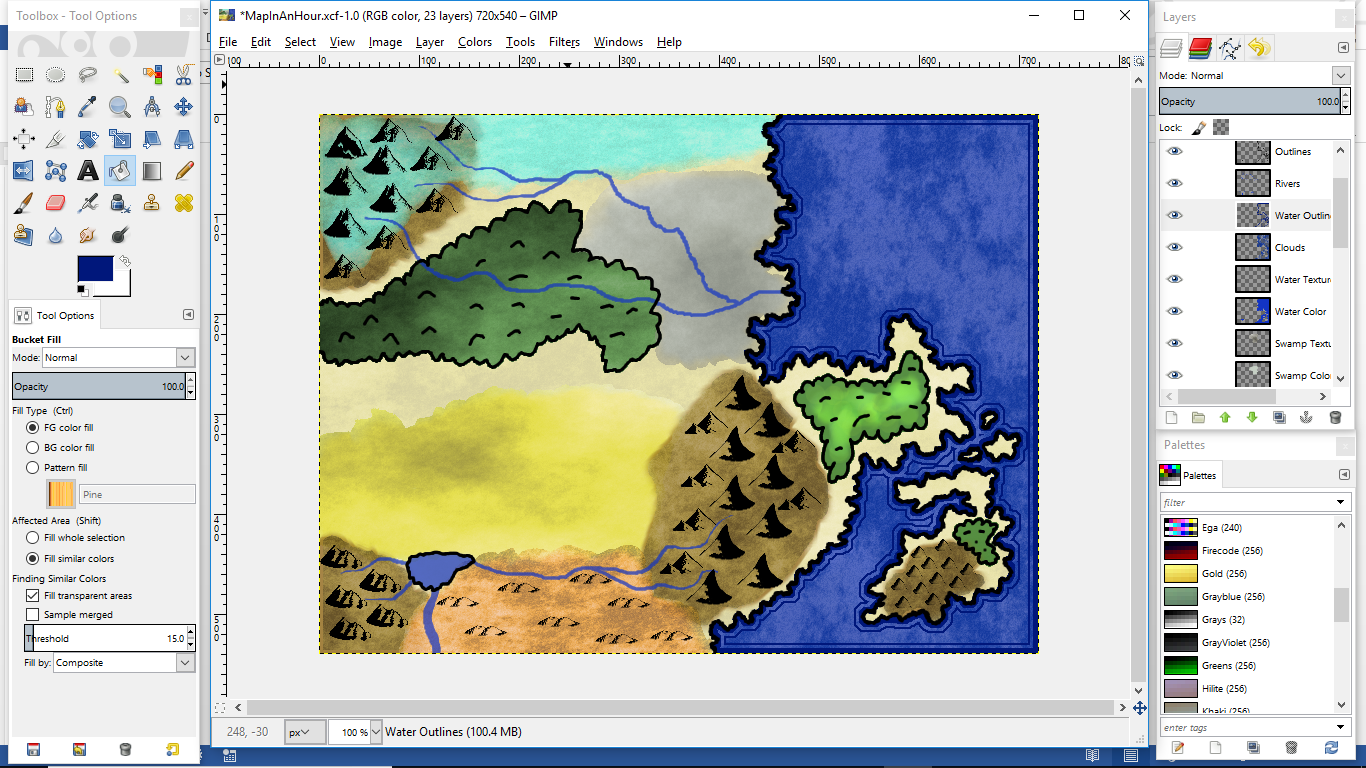
To make a line of darker blue just off the coastlines, I started by making a new layer called Water Outline. On the Water Color layer, I used the magic wand to select the water, then went back to the Water Outline layer where I used the paint bucket to fill in the selected area with a dark blue. I then shrunk my selection using Select -> Shrink by 5px and hit the delete key to delete everything leaving a dark blue outline on the coastlines. Then I shrunk the selection again by 3px and repainted the smaller selection in the darker blue again. That made a huge blue over all the water, but I next shrunk the selection again by 2px and deleted to make it a second dark blue line just off the coast. This gave the coast outlines you see below. (You could make your lines thicker/thinner or closer/farther apart by changing how much you shrink by each time.)
Time for the Hex Grid?
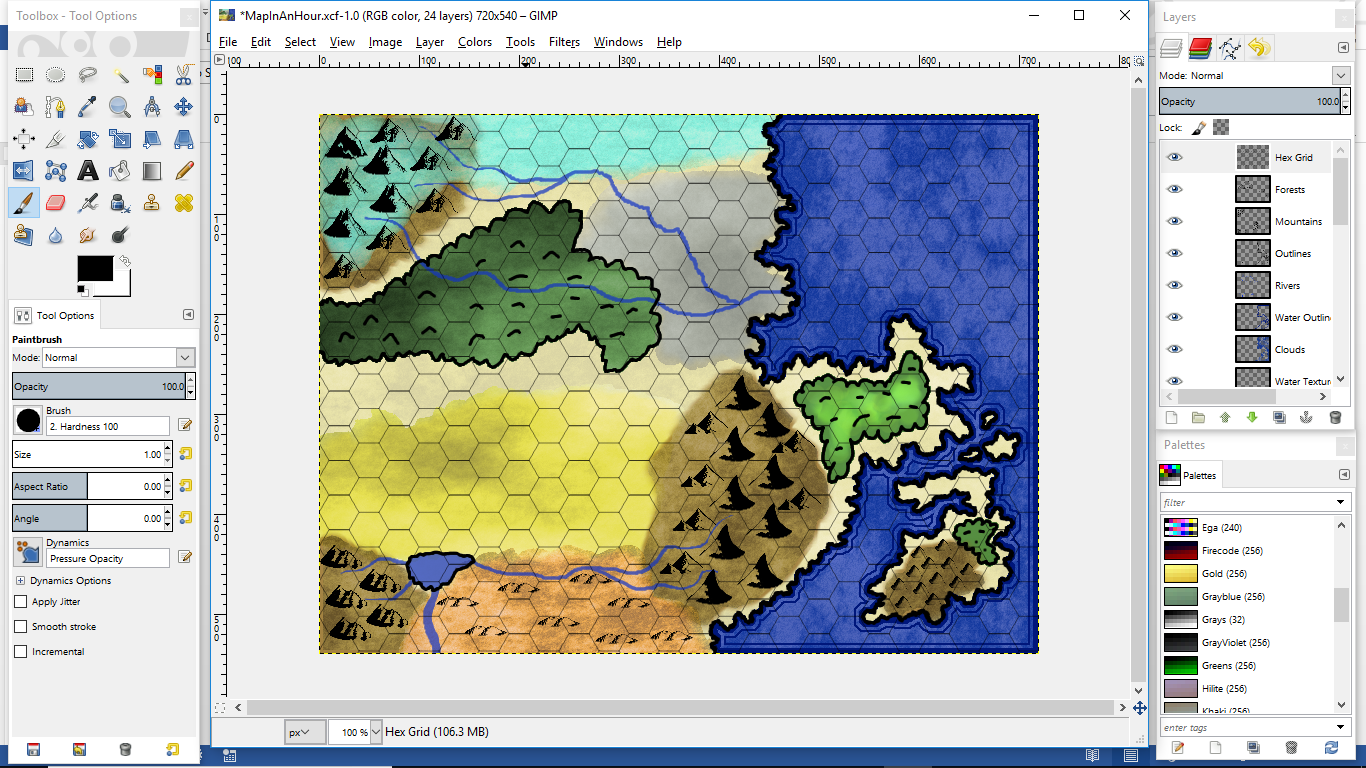
I would still like to put some scraggily looking trees in the swamp and add some cities to the map, but I’d like those to sit nicely inside the hexes I’m going to make. Therefore, I’ll get the hex grid ready now before finishing up the map icons. To do this, you guessed it, make a new layer titled Hex Grid which I put on top of everything else.
To use the hex grid script, first make sure you have the script installed in the correct folder. Then I selected the color black on the paintbrush tool with a 1px size. Next, go to Filters -> Render -> Pattern -> Hex Grid and I used a Length of Element of 20. That gives me the following as an overlay.
Cities, Swamps and Names
Now I’ll put in some city icons, swampy tree icons, and anything else we’d like on a new layer using the paintbrush tool and your favorite map icon brushes. After that, I’ll throw some names on top using your favorite fantasy looking font (I used Blackadder).
Border and Title
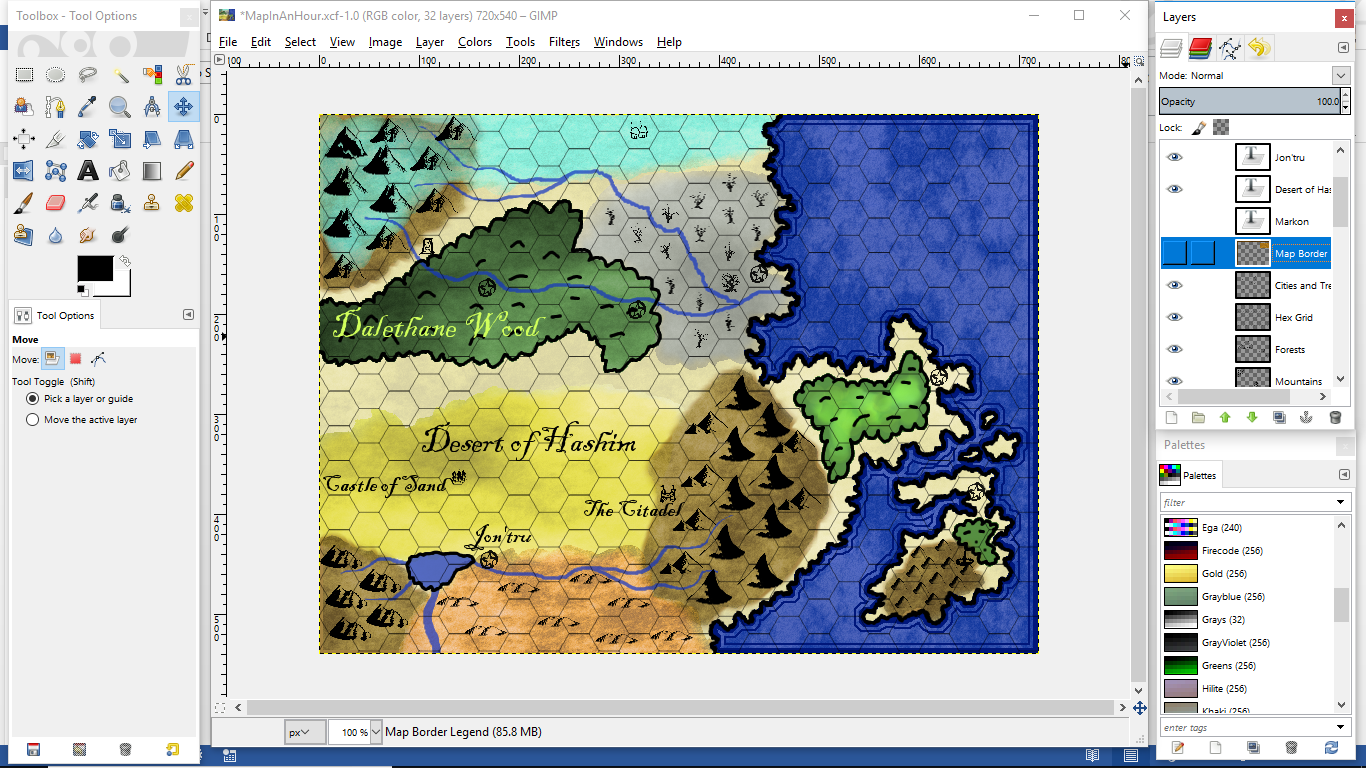
The final thing I’ll do is use the same method I used for the water coast outlines to make a dark brown border for the map as a whole. Make a new layer called Map Border and fill it with a dark brown. You can then make a new layer to add texture to the brown if you like. If you do, I right clicked on that texture layer and merged it down with the Map Border layer. That will let me delete the brown and the texture at the same time to leave just the border by selecting all, shrinking the selection by 5px, and then hitting delete. That’s a basic border! I did that process one more time to get a second border. Not sure that it looks great with a thinner border after the thick one, but you get the idea.
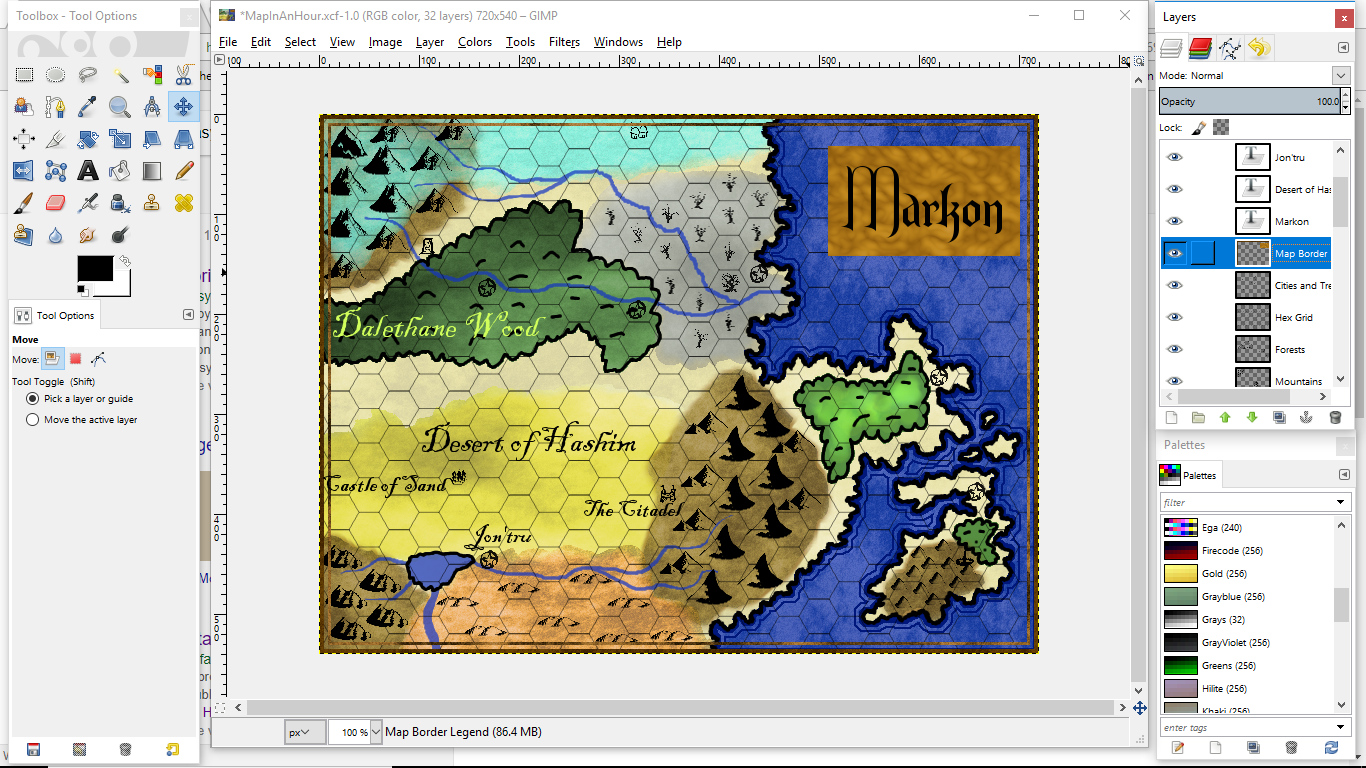
The last thing I did was add a tan rectangle on that layer, used the texture trick with Fog, merged down, and then put the title of the world on the newly created nameplate. It’s called Markon since I may be marking on the map!
Saving the Map
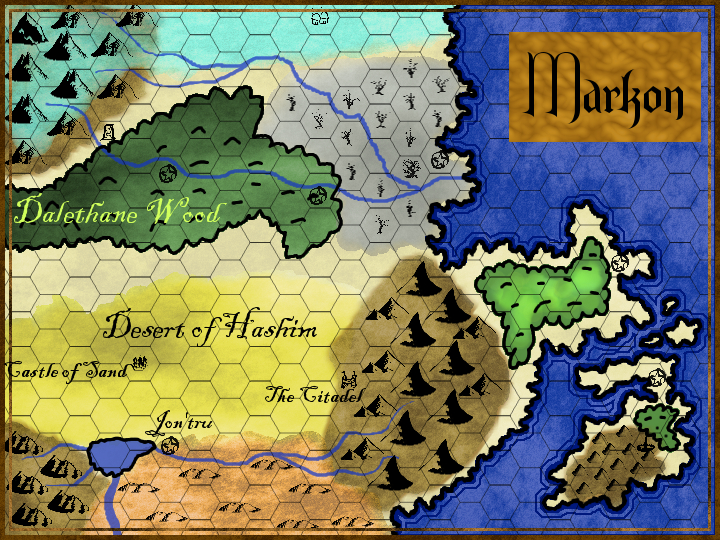
Whenever you save a file in Gimp, it saves it as an actual Gimp file. That’s good because it preserves all the layers and things for you to rearrange as needed later on. However, if you want to post the map to your RPG group online or print it out, you’ll want it as a JPG. To do this, you go to File -> Export As and just type the name of your map followed by .jpg or .png or whatever is your preferred image type. Here is the final product which as a non-compressed .jpg is less than 1 MB (good for posting online).
Fine Tuning
If the colors are still too strong for you, you can always throw another layer of plasma on top of everything else and set the transparency fairly low. This will mute the colors. The other option is to merge all the layers down into a single layer and then colorize the whole map a sepia tone.
One other thing you may want to do that I’ve done in the past is add tree trunks on the bottoms of all the forests by using a slightly thicker paintbrush set to a dark brown on the Forest Color layer. Next add a little color (high transparency, light brown) behind the tree trunks to get this.
Reflections on this Tutorial
Did I say an hour? Well, the first time through this process, it may take you more than an hour. However, the quicker you get with all the tricks and such, the faster you can do this. Either way, I hope you’ll try to flex some new creative muscles by making some maps of your own. Remember, the maps you make don’t have to look amazing. (We’re not all professional cartographers!) They just need to inspire you and your players to have fun, and hopefully this can get you started in that direction. If you’d like more in-depth tutorials, just Google “fantasy map tutorial” to find the style you would like to emulate.
I decided to try making some maps of my own as a means of solo-playing some RPGs. While not perfect, I made myself a hex crawl with random encounters that I could explore completely on my own. I enjoyed learning to make maps, and hope to keep honing this skill in my free time. Please check out www.PlayEveryRole.com for more thoughts and resources I’ve created on solo-play, RPG creation, and more. Happy gaming!